The Media Library tab is where you can manage images and videos for products.

Images
Search, Filter, and Sort Images
You can find images in a number of ways:
- Search
Enter the product number, product name or keyword in the search box at the top left of your screen and click the magnifying button. You can search for multiple images by separating them using a comma and a space.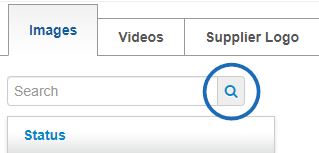
After searching, you will be able to use the filters to narrow your results further using the available options. - Filter
Filter your products by the criteria listed in the left hand column of the page: Status, VS (Virtual Sample) Status, Colors, and more. The number in parenthesis is the amount of images which are categorized within the option.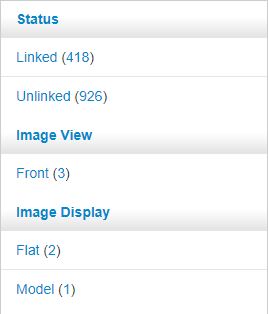
Click on the See All link to view all values within each criterion. - Sort By
Click on the Sort by dropdown and choose to sort your images to display in the order you prefer.
You are able to sort by :- Newest
- Oldest
- File Size
- File Name
-

Upload Images
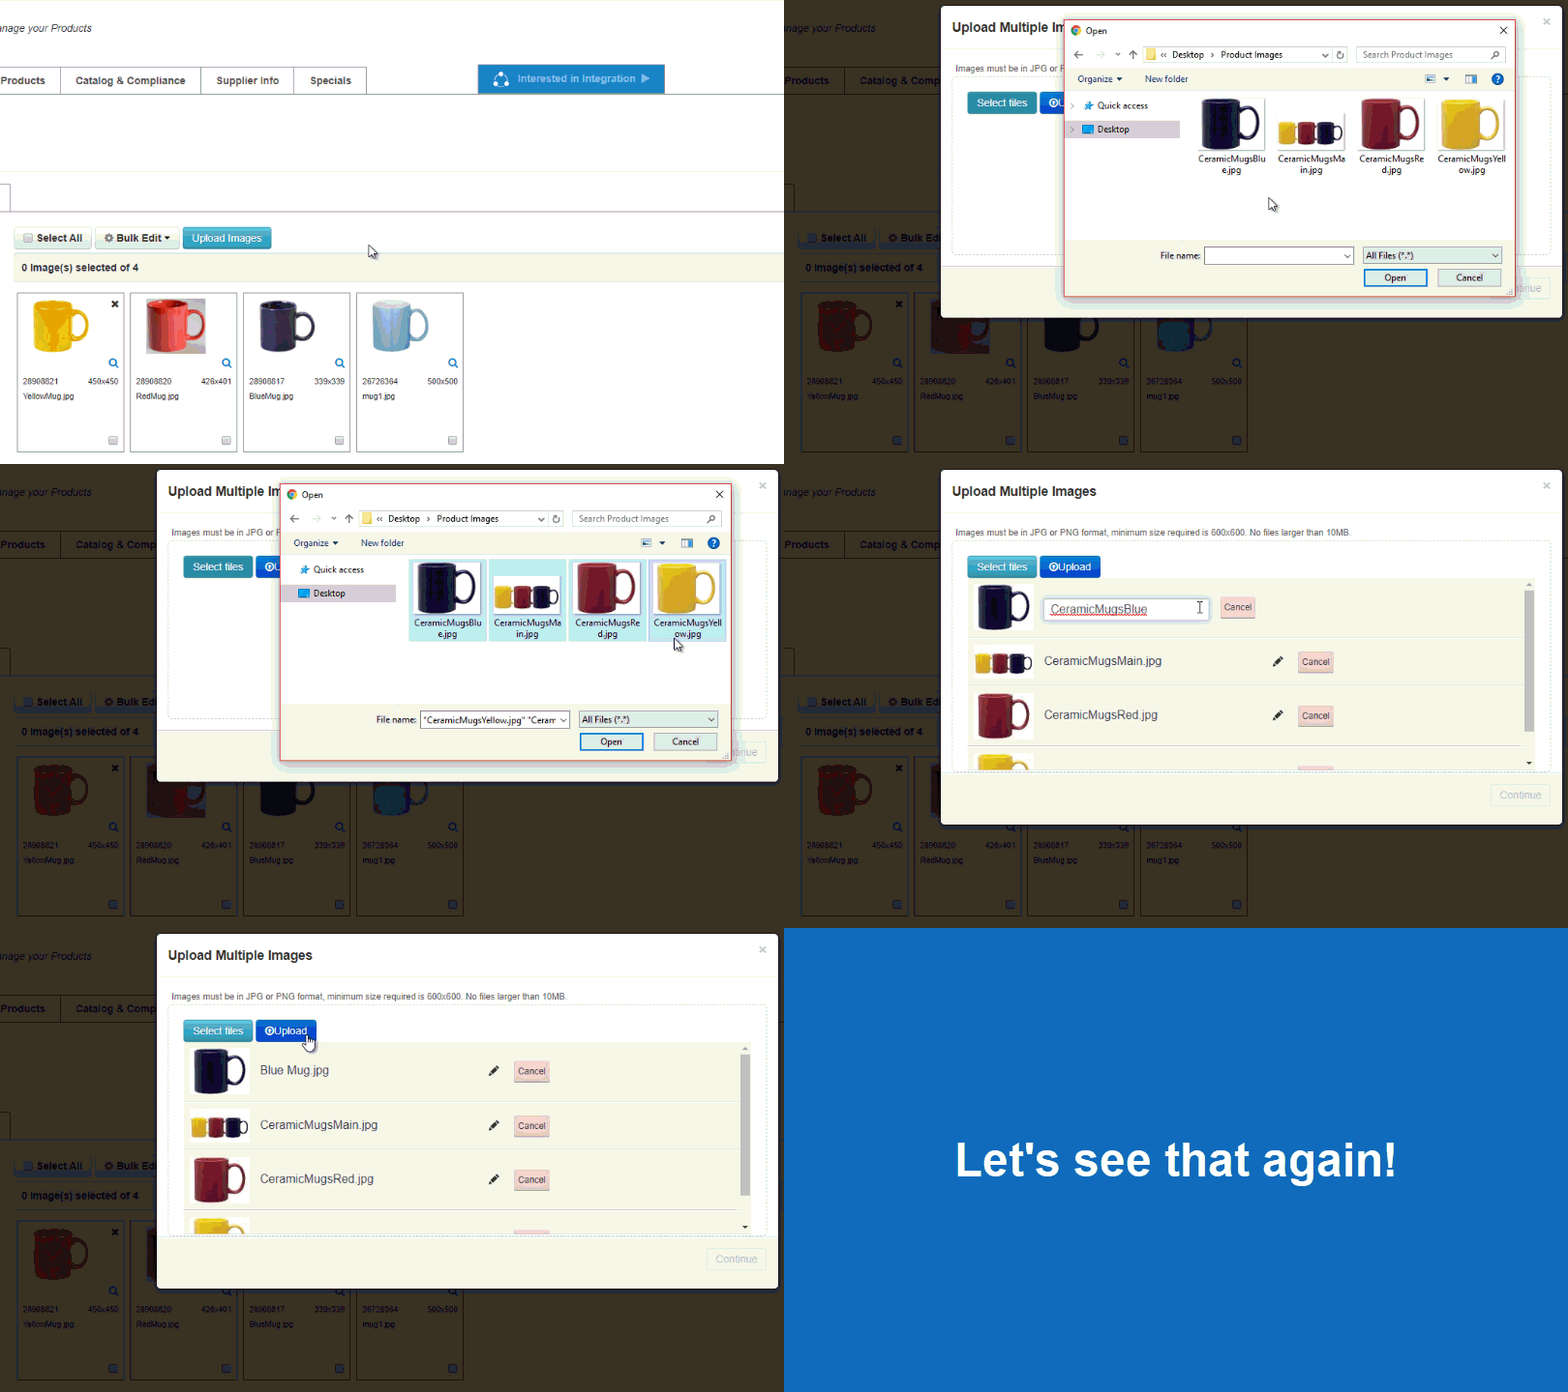
To add images in the Media Library tab, click on the Upload Images button.
Please review the image requirementsprior to uploading images.
In the Upload Multiple Images window, click on the Select Files button. Browse your computer, select the image(s) you would like to upload, and click on Open.
Note: Hold the CTRL button on your keyboard to select multiple images.
After the images are opened, you will have the opportunity to rename the image file(s) using the pencil icon. Then, click on the Upload button. The success banner will display beside the image(s). Click on the Continue button to return to the Images tab of the Media Library.
Tag Images
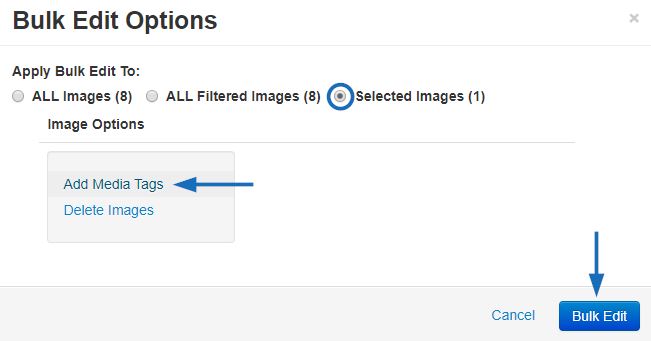
To add Media Tags to images, click on the checkbox in the lower right corner of the image(s). You can also use the options to the left to filter images and use the Select All button. Once you have chosen the image(s) you would like to tag, click on the Bulk Edit button. Chose which products to apply the bulk edit to:
- ALL Images (every uploaded image in the Media Library)
- ALL Filtered Images (any images which meets the criteria selected)
- Selected Images (only the images you have specifically marked)
Next, click on the Add Media Tags option and click on the Bulk Edit button.
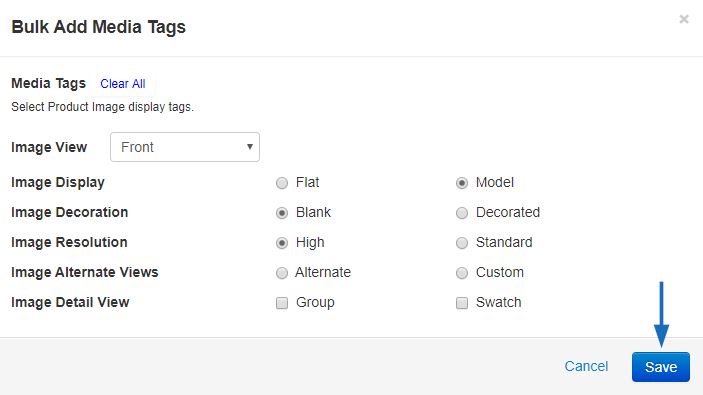
Select the tag(s) you would like to apply. It is recommended you enter a selection for as many fields as possible, but if an option does not apply to the image(s) with which you are working, you can leave a field empty. If you need to clear your selections, use the Clear All link. When you are finished, click on Save.
Delete Images
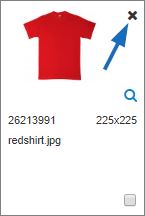
To delete an individual image, hover on the image listing and then click on the "X".
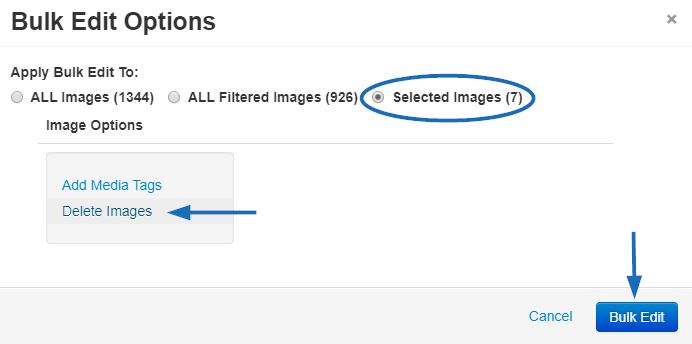
To delete multiple images, click on the checkbox in the lower right corner of the image(s). You can also use the options to the left to filter images and use the Select All button. Once you have chosen the image(s) you would like to delete, click on the Bulk Edit button. Chose which products to apply the bulk edit to:
- ALL Images (every uploaded image in the Media Library)
- ALL Filtered Images (any images which meets the criteria selected)
- Selected Images (only the images you have specifically marked)
Next, click on the Delete Images option and click on the Bulk Edit button.
Videos
Add a Video
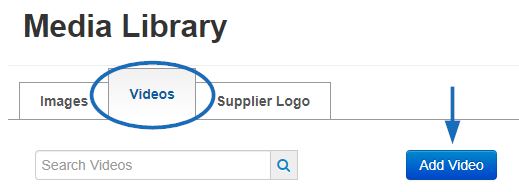
To upload a new video, click on the Add Video button. Please note, a list of previously uploaded videos will be displayed.
Enter information in the required fields and then click on the "Save" button.
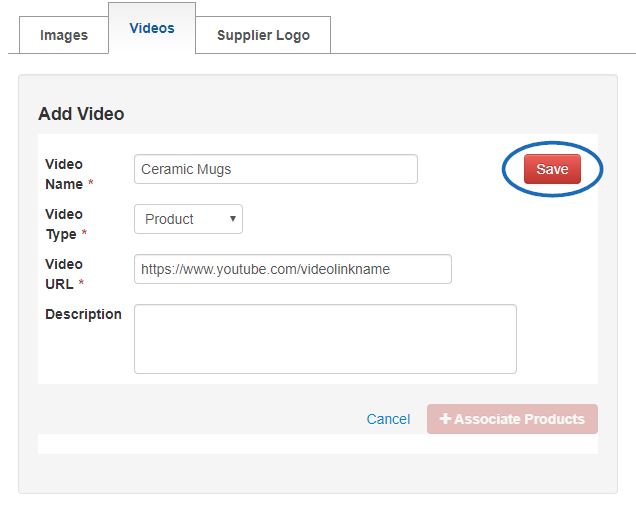
Note: All required fields must be completed before the "Save" button will be enabled. The Video Name, Type and URL fields are required. However the description field is optional.
If you are using Microsoft 10 with the Edge browser, you may not be able to upload a video. Please use a different browser, such as Google Chrome or Mozilla Firefox.
Select Product as the Video type. (The ability to add a Supplier video is a future functionality). Accepted video URL types are YouTube, Vimeo, or Facebook. Every Product Video must have a unique URL.
Note:If you are providing a video via Vimeo and have a Vimeo plus account, we recommend that the end screen of your video be customized so it does not display suggested videos from Vimeo staff or other Vimeo subscribers. Please refer to the Vimeo Help Center for more information on their end screen offerings.
Add Products to a Video
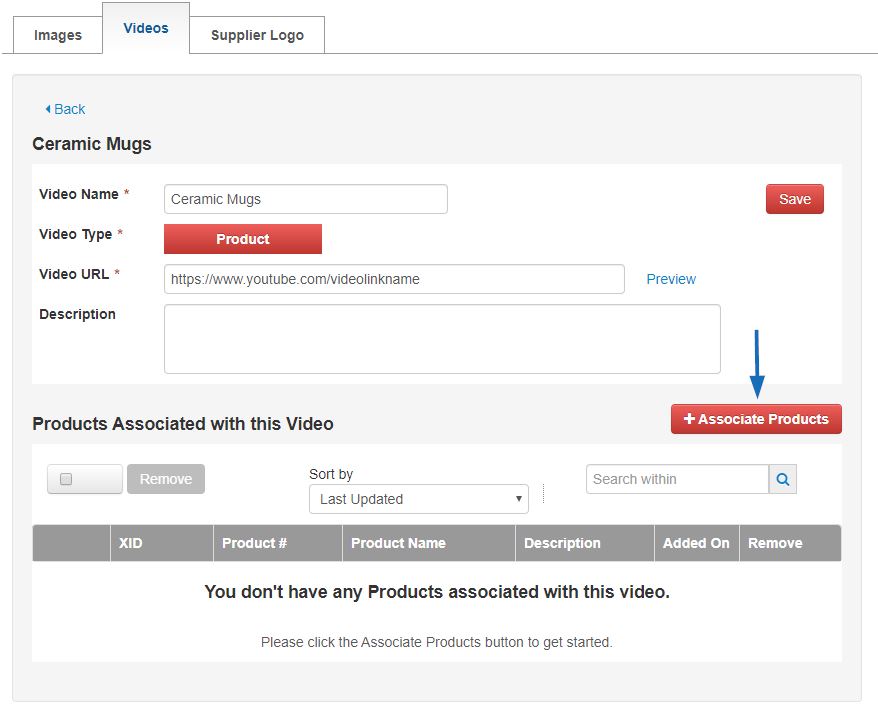
Once you have uploaded and saved the video, you will have the ability to add products. Scroll to the bottom and click on the "+ Associate Products" button.
A listing of all of your active products will display. From here, you can select all of your products by checking the "Select All" box or you can use the sort and filter features to locate and select specific items. Check the box under the image of each product you want to add then click on the "Add Products" button.
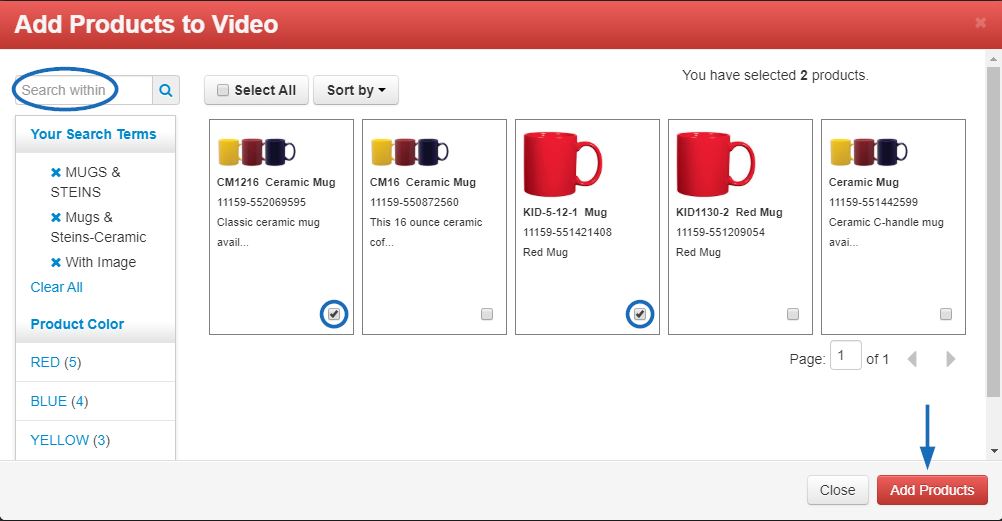
If any of the products you've selected are already associated with another video you will receive a message listing the products that were not able to be added to this video. Click OK. You will have to delete the products from one video before you can add them to another video.
Note:Deleting a product from a video will not remove the product from the ESP Database.
A list displaying all products associated with the video will then display at the bottom of the page.

You can also add products to an existing Video by going to the Media Library from the main Updates screen. Click the Videos tab. Find the Video you want to add products to and click Edit. Then, follow the same steps as adding items to a new video, as stated above.
Delete Products from a Video
There are several ways to delete products from videos while you are in the Media Library. Find the video from which you want to delete products and click Edit.

You can select products to remove by clicking on the checkbox for the product listing or select all products using the checkbox at the top and then clicking the Remove button. You can also remove individual products by clicking on the trash can icon to the far right.

If you have many products associated with the video, you can easily find the products you need to remove by using the "Sort" filters or Search field.

You can also remove the product from the video while you are on the Media Page of an individual product. To do this, go to the Manage Product Tab and locate the product. Then, click on the Edit button.

Click on the Media section.

Above the product images, the video associated with the product will be listed. Click on the Preview link to watch the video in a pop-out window. Click the "X" to remove the video from the product.

Delete a Video
Access the Media Library from either the main ESP Updates screen. Click on the "Videos" tab. A list of existing videos will display. If you have many videos you can enter the Video Name in the search field to find the video you wish to delete.
On the right side of the screen click the Delete button. The video will be removed and products will no longer be associated with that the video, but the items themselves will remain in the database.


